XRECHNUNG Tutorial 2, Reading an XRECHNUNG XML file
In order for i-effect to automatically import XRECHNUNG files, a new workflow must be set up in the *SERVER automation module.
The prerequisite is that the mappings and XML schema definitions have been installed on the system. These are not included in the standard scope of delivery.
When you purchase the XRECHNUNG licence module, you will receive these mappings together with the necessary XSD files, or they will already have been installed on the system as part of a service you have commissioned.
Step 1: Create a job
Select Automation from the main menu.
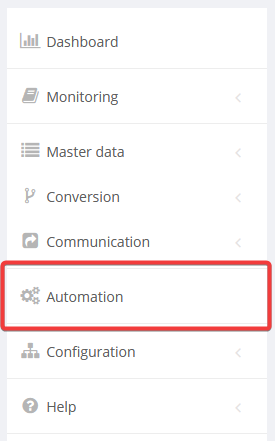
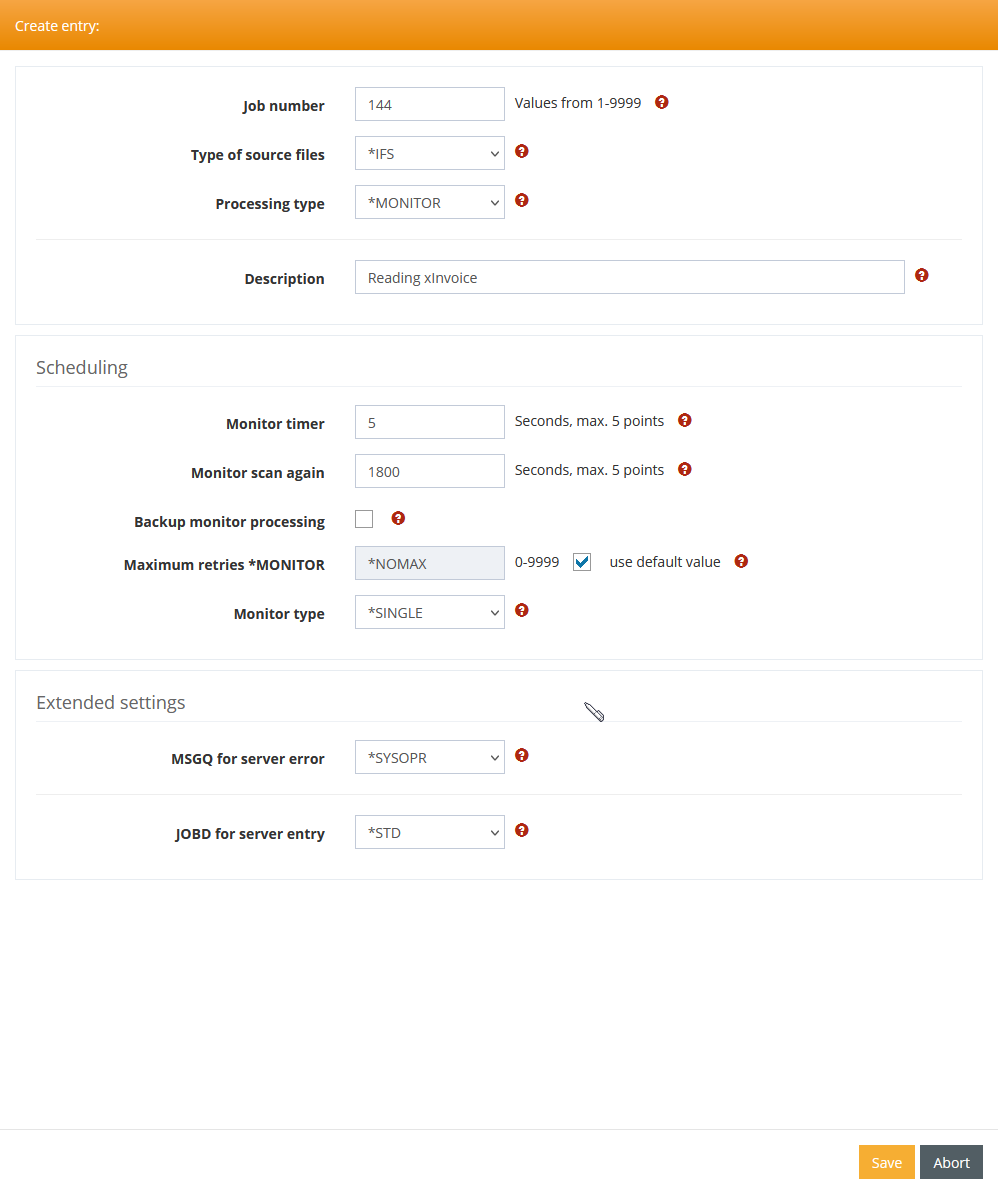
To create a new job, click on the plus sign in the "Filter settings" line.

In the following window, you can define a monitor job, for example. It monitors directories for newly arriving objects.
Step 2: Define processing
Clicking Save in the previous dialogue box opens the following window. Click on the + sign here to define a new processing step.

The parameters in the processing step are filled as follows. If necessary, use the Enter command button to obtain input help for the PRCEINVOIC command.
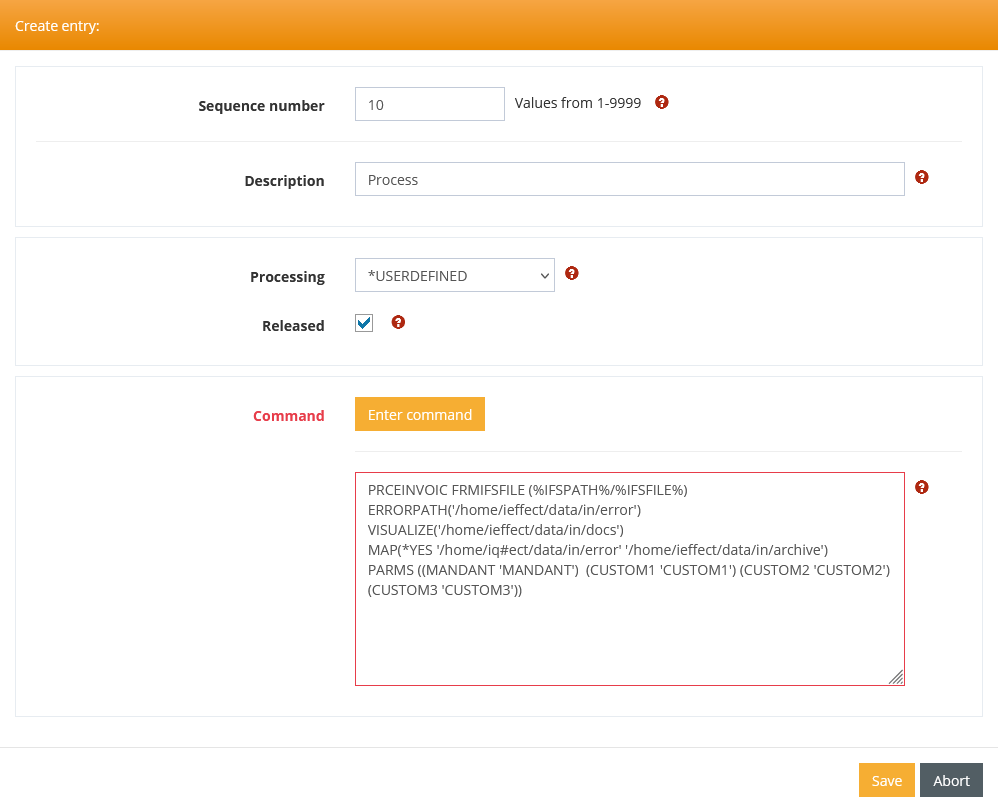
The parameters of the PRCEINVOIC command have the following meanings
Parameter | Value |
|---|---|
FRMIFSFILE | The name of the XRECHNUNG file to be processed. When using an IFS monitor, the placeholders %IFSPATH/%IFSFILE% are used to refer to the file recognised by the monitor. |
VISUALIZE | Here you can specify the name of the output path where a PDF visualisation of the XRECHNUNG should be stored. |
ERRORPATH | The name of a directory in which incorrect data is to be stored. If, when checking the file to be processed against the schema or the underlying business rules, it is detected that the file is invalid, it is moved to the directory specified here. |
MAP | The parameter consists of three parts |
PARMS | By transferring the user parameters MANDANT, CUSTOM1, CUSTOM2, CUSTOM3, the fields of the same name in interface ZF23INVHT can be filled with individual data. |
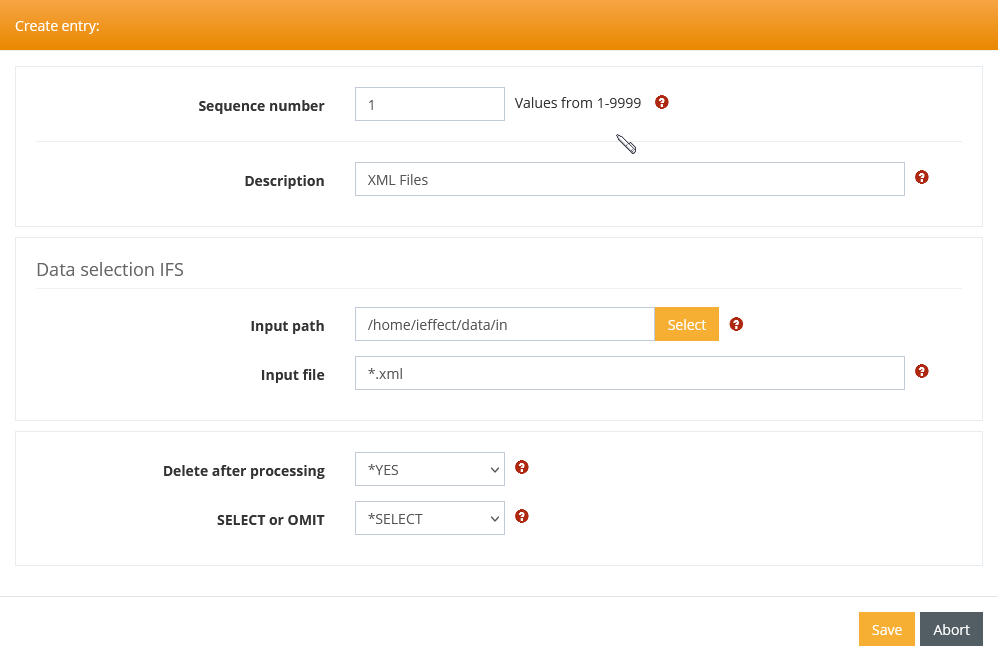
Step 3: Define data selection
Click on the + sign in the Data Selection section to define a new selection.
Specify the directory and file name patterns to be monitored by the monitor.