The Mapping-Editor
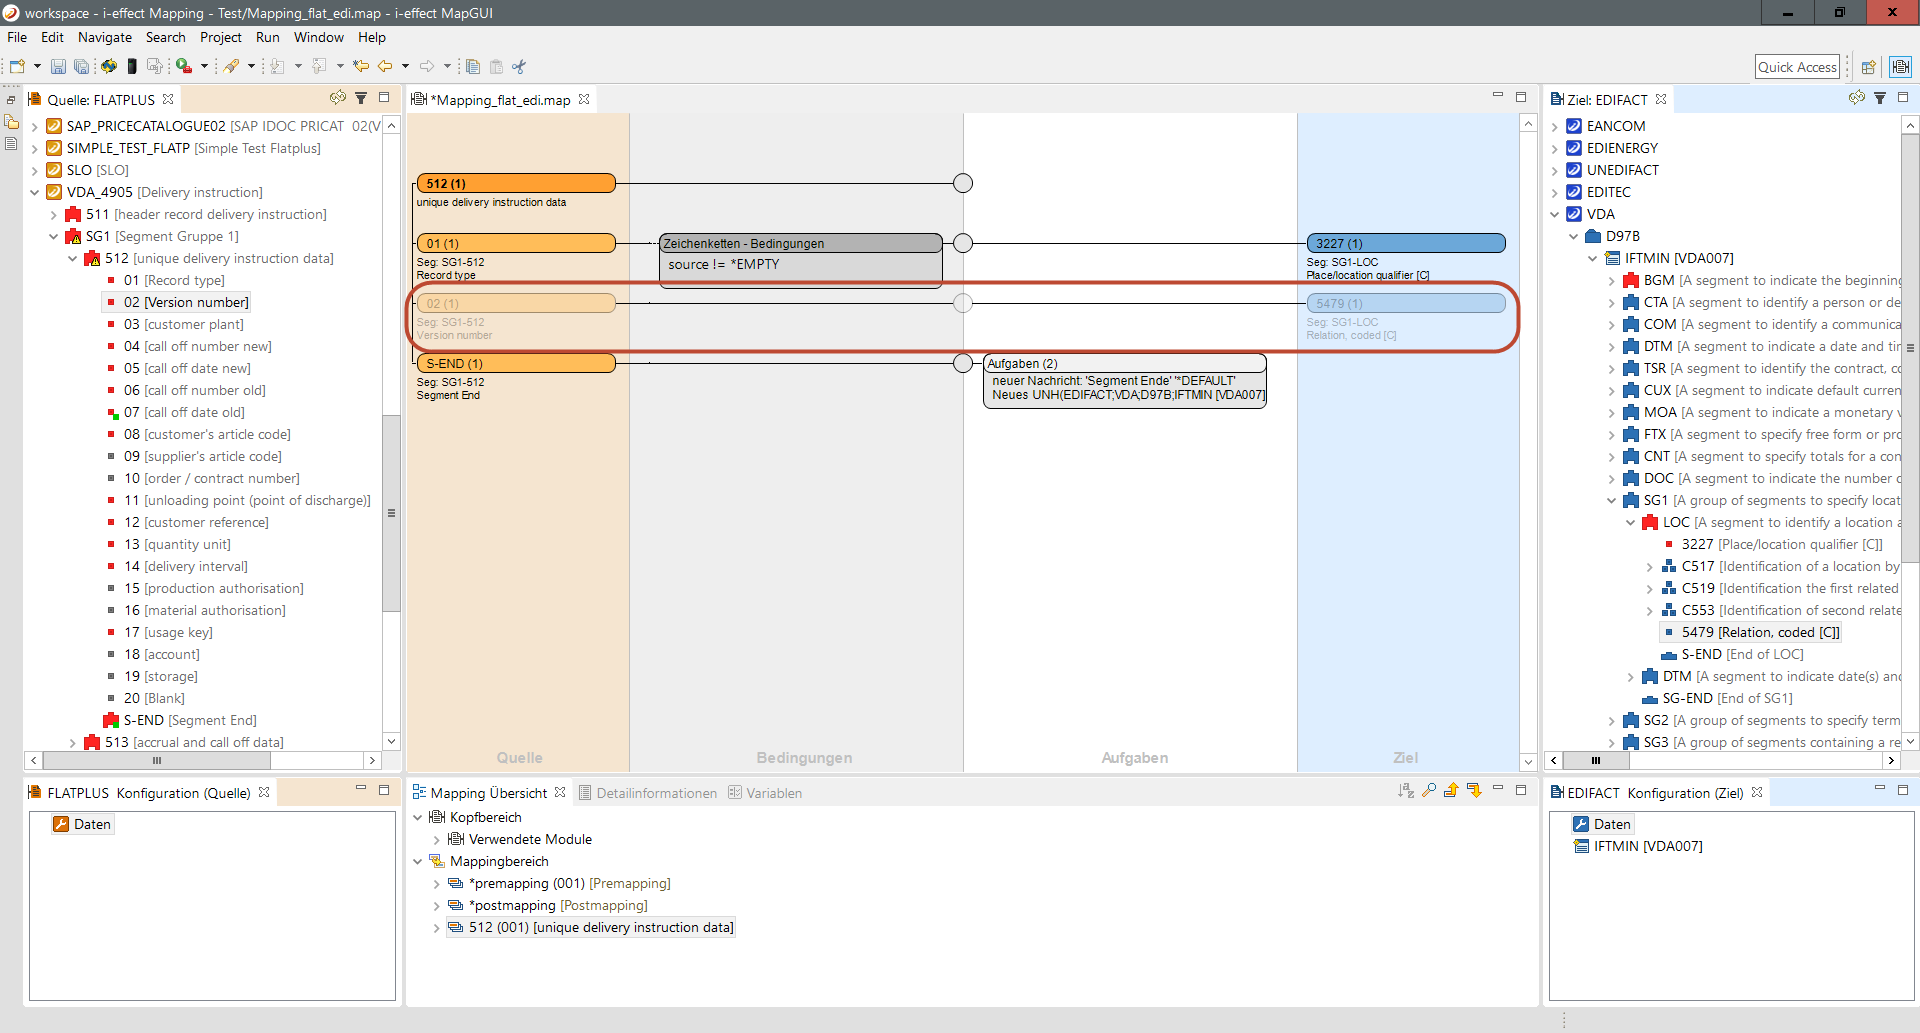
The mapping editor is divided into different areas that are described in the following.
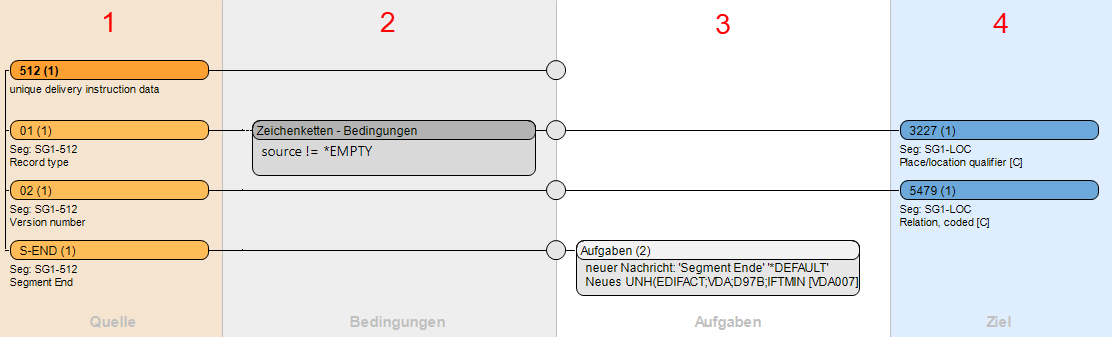
The editor is divided into 4 general areas:
- Source (1)
- Conditions (2)
- Tasks (3)
- Target (4)
Source (1)
The source area 1 takes elements from the source view, whose values will be mapped in the corresponding target fields. The editor only takes elements into the overview that belong to a group (e.g. all data elements of the DTM segment or columns of a table). The editor recognizes whether an element belongs to a group and opens a context menu if it is dropped into the source area: an element can be added to a group or directed to a new mapping in a new overview.
Step 1:
Drag a field in the source area of the mapping editor: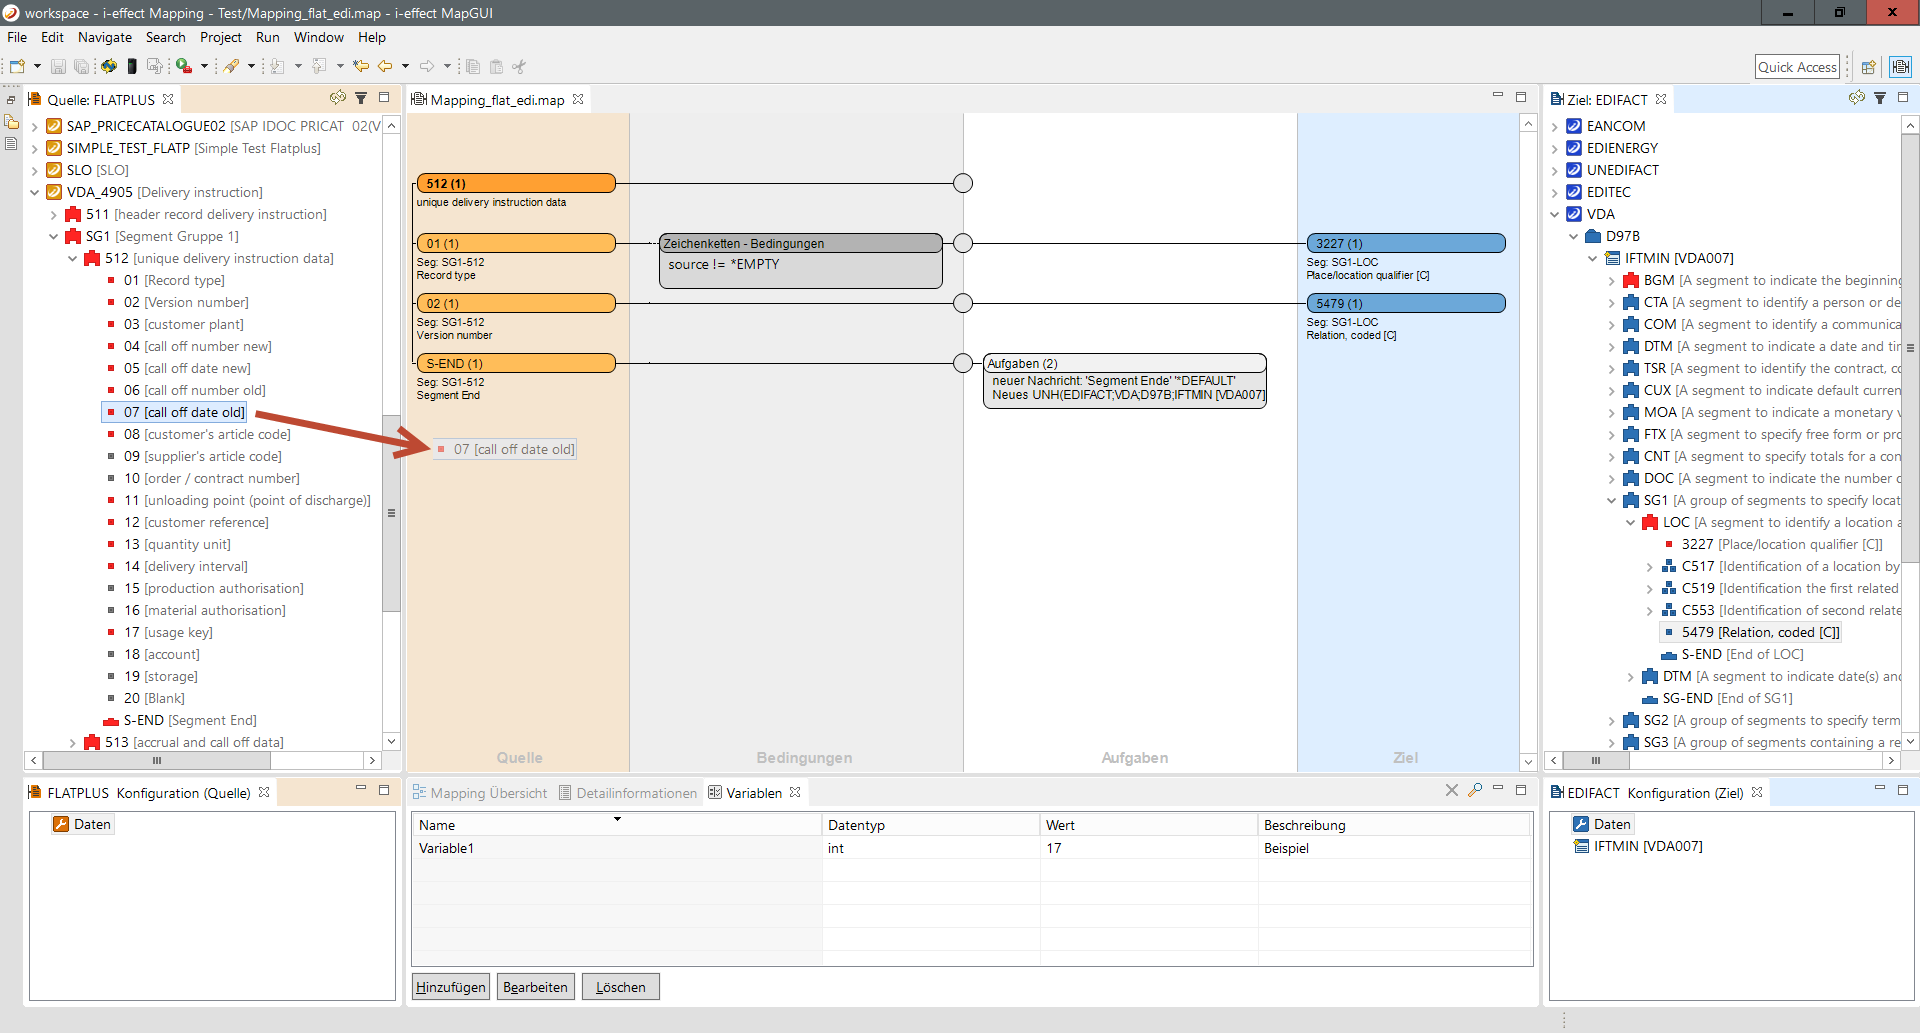
Step 2:
Now decide whether to add the object to the group or to create a new field mapping.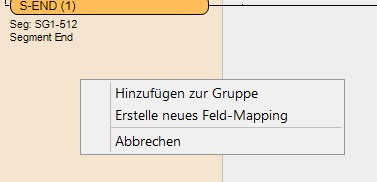
Step 3:
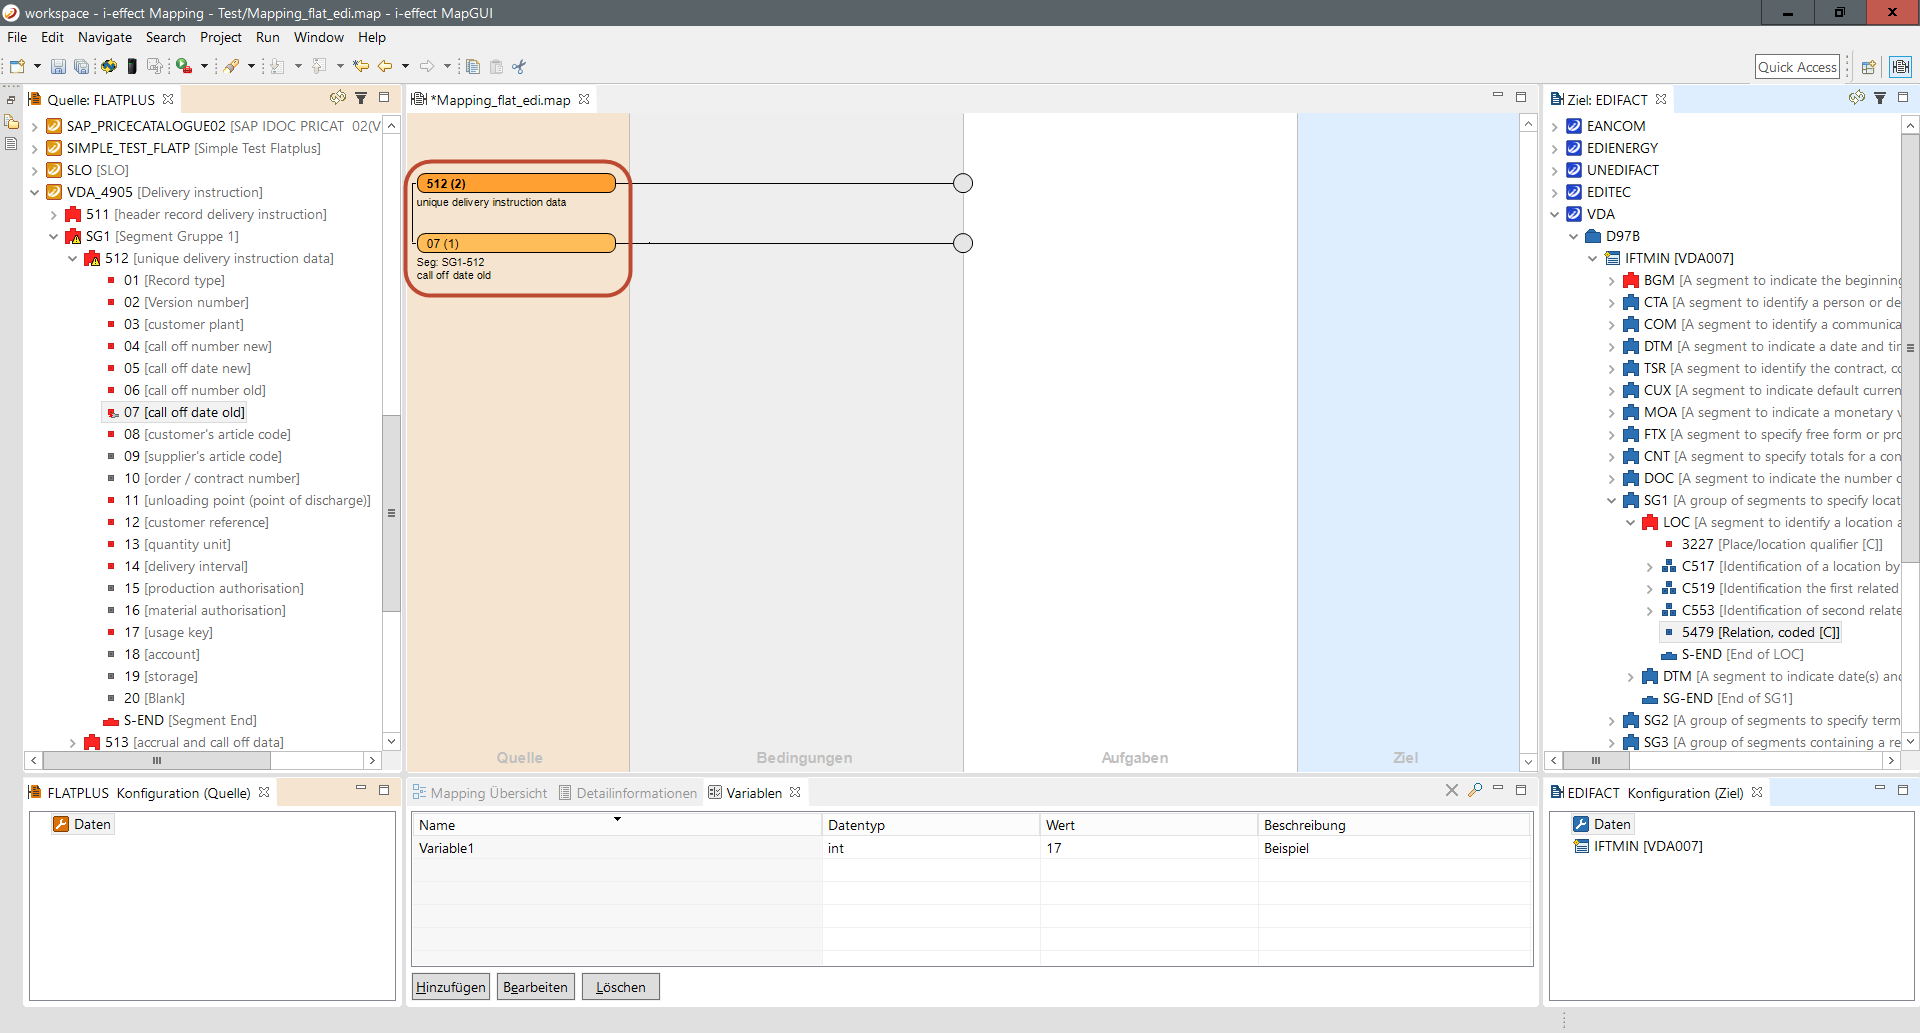
If you add it, the object will be added to the current mapping area. 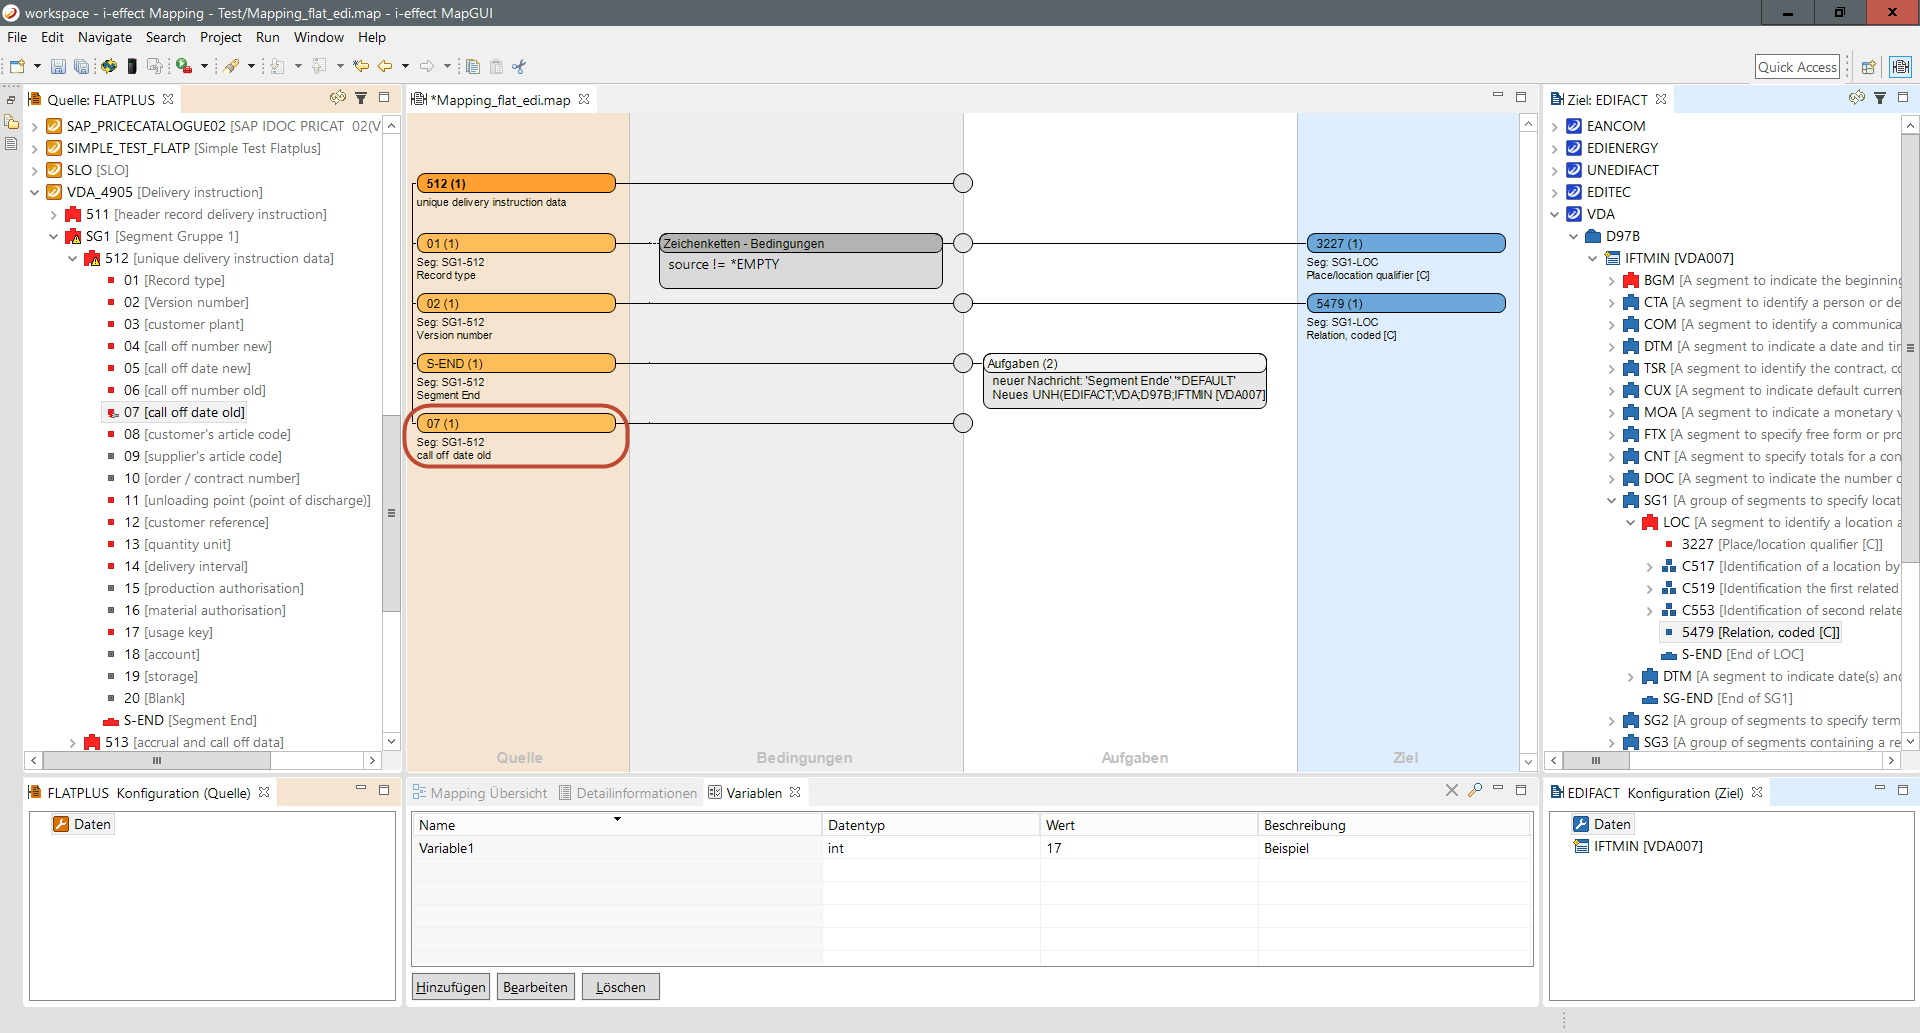
Step 4:
When you assign it to a new group, a new goup will be created in the mapping overview.
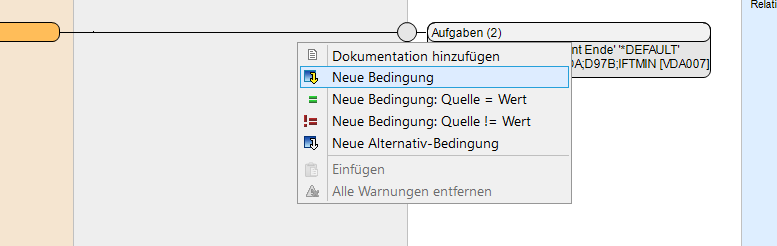
Conditions (2)
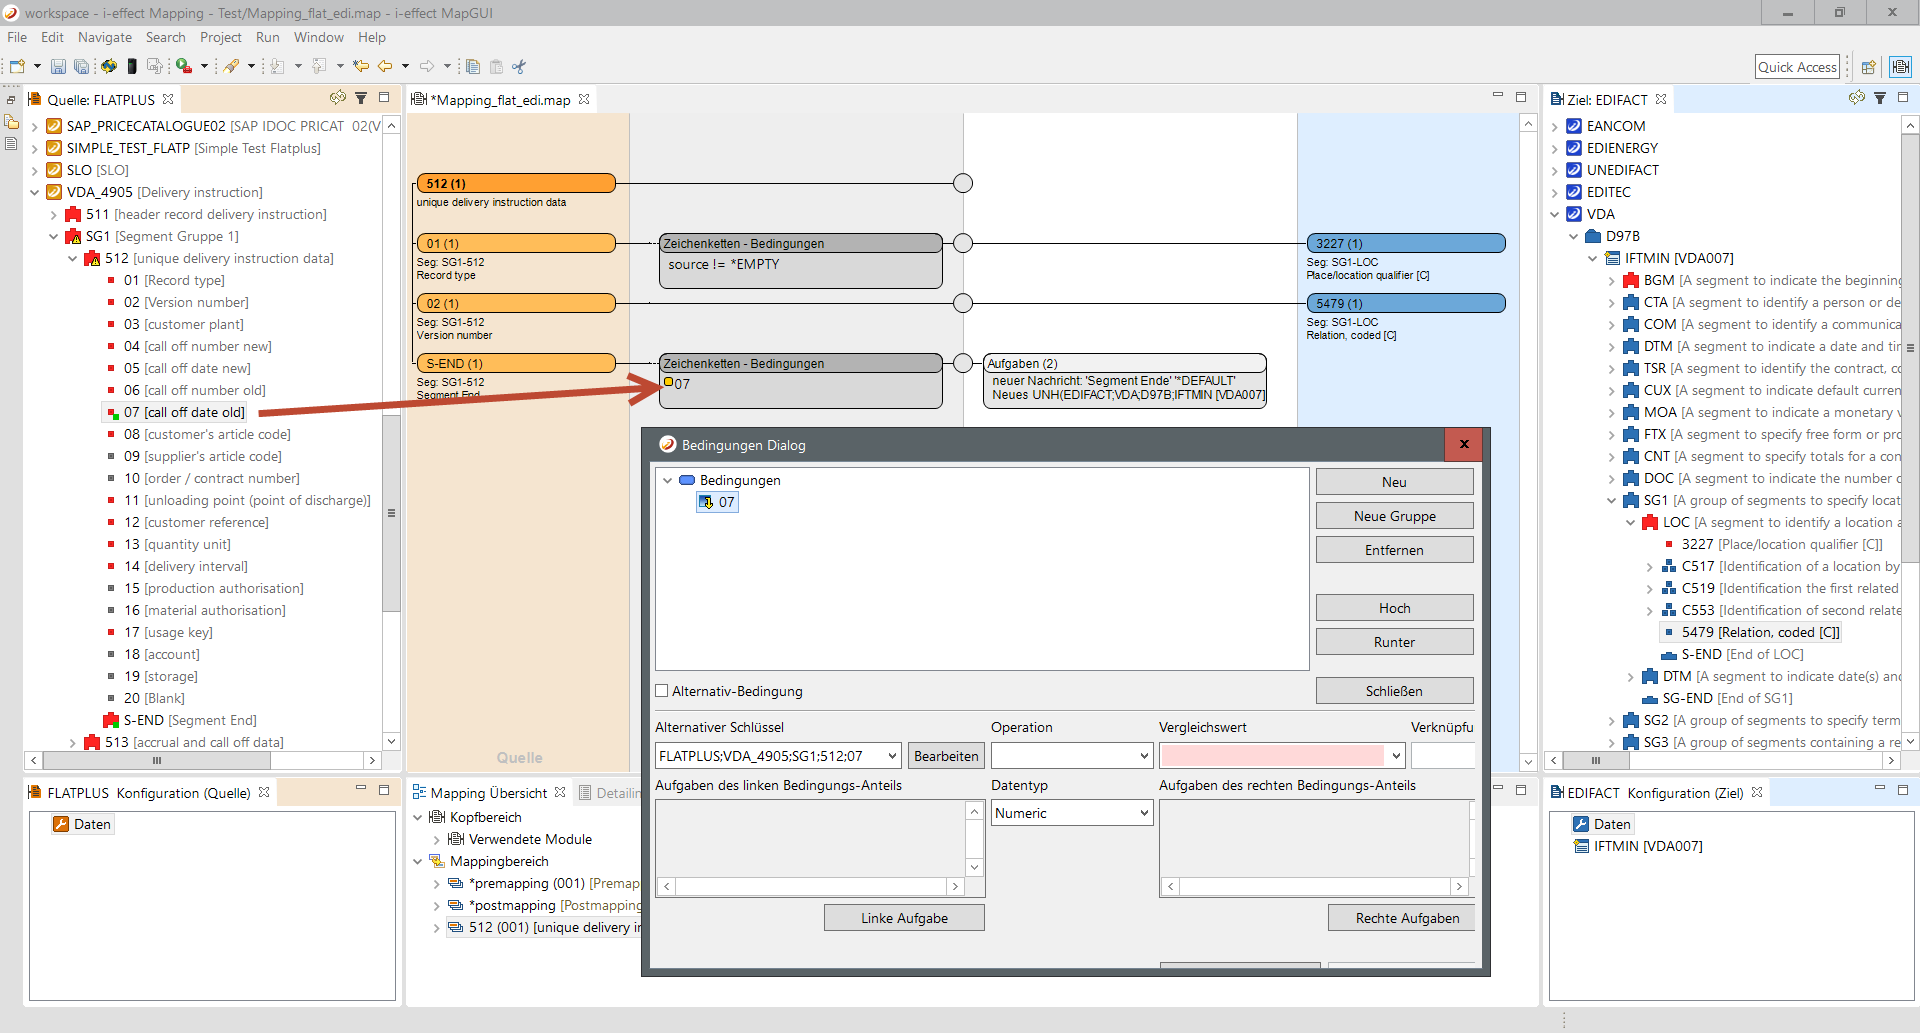
A single right-click within this area opens a context menu allowing users to add conditions to the given mapping.
It is also possible to drag and drop a source element into this area. The dialog opens automatically. In this case, a referential value is meant that is used for comparisons
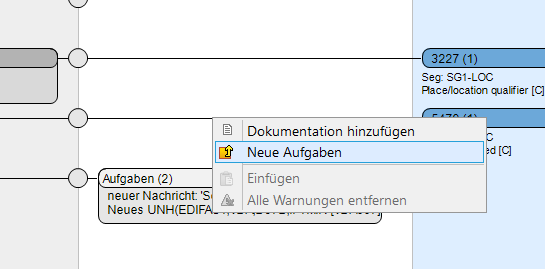
Tasks (3)
In the third area users can define a list of tasks that will be applied to the mapped value (among others).A single right-click in this area opens a context menu enabling the adding of tasks.
Target (4)
The target area takes elements from the target view and combines them with the next available source element (based on the target).
In this area it is also possible to drag and drop a source element onto a target element. Please keep in mind that this form of mapping will be explained later. At this point, it is though worth mentioning that with this method it is possible to combine values from many sources.
Deactivation of Mappings in the Editor
Individual mapping, which won't be used in the actual mapping process, can be deactivated within a group.A mapping can be deactivated and reactivated by its source element. A single right-click on the source element opens a context menu, where the option called Deactivate Mapping can be selected.
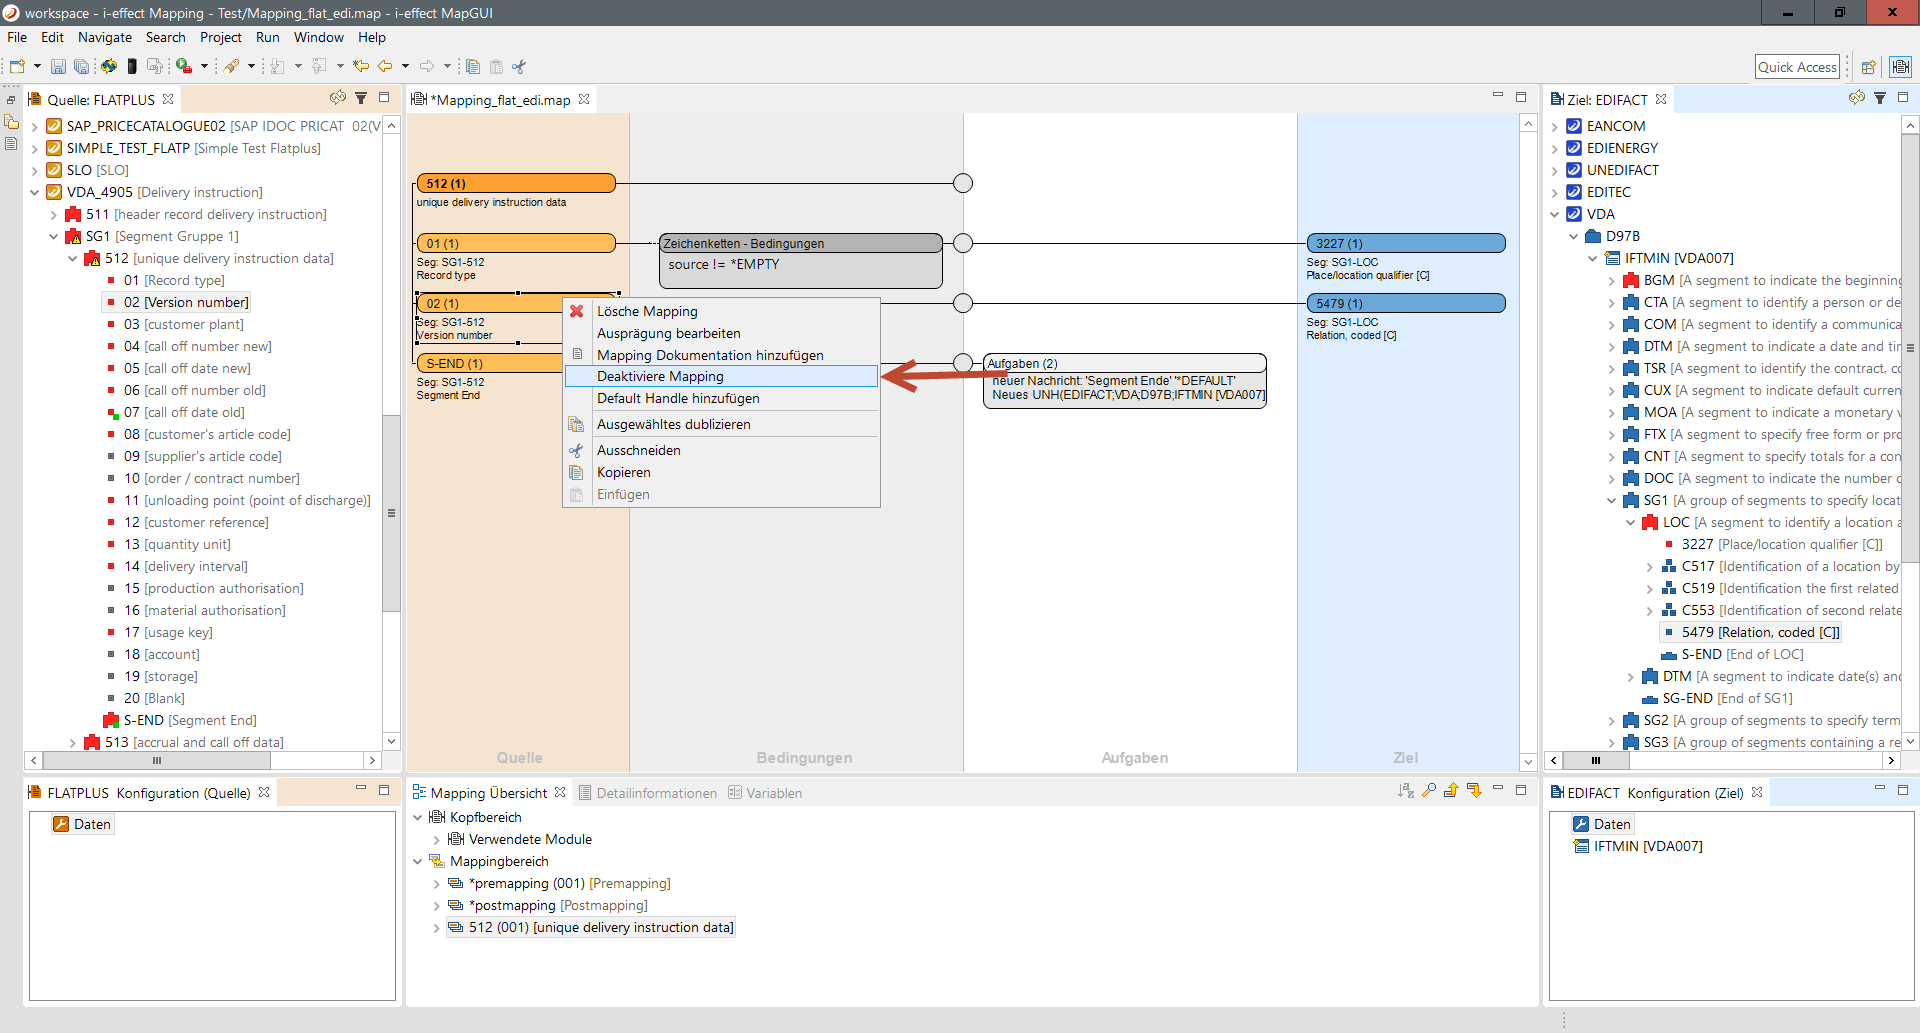
Deactivated mappings will still be displayed in the editor, but will now be transparent: