Setting up Jaspersoft Studio
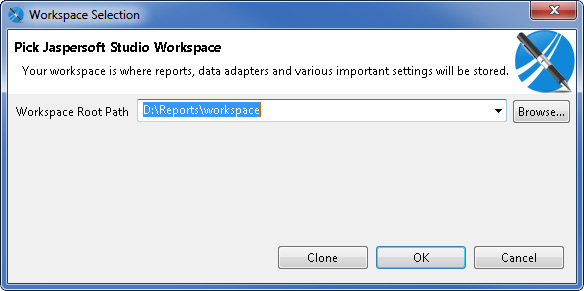
If you start Jaspersoft Studio for the first time you have to select where you save the report-workspace.
After starting, close the "Welcome" tab on the top left. Afterwards you need a connection to your database. Therefore it is required to put in the according driver and store in the parameters required for the database-connection.
This manual describes the use of Jaspersoft Studio in the context of i-effect® to use the created reports with IBM i as an operating system on an IBM Power Systems. On this system, a relational database IBM (DB2) is installed.
In the case of a connection to an IBM DB2 database, a setup of Jaspersoft Studio is required as described now:
Customizing the class library
Copy the file "jt400.jar" in a folder on your local PC, e.g. D:Reportslib.
The file "jt400.jar" is normally located in the following folder of your IBM Power Systems:
„/QIBM/ProdData/HTTP/Public/jt400/lib".If the file is not available on your system, this library can be downloaded as a part of the IBM Toolbox for Java via the licensed program 5722JC1 or alternatively via the following link as OpenSource version of the IBM Toolbox for JAVA (http://jt400.sourceforge.net/)
Creating a new database connection
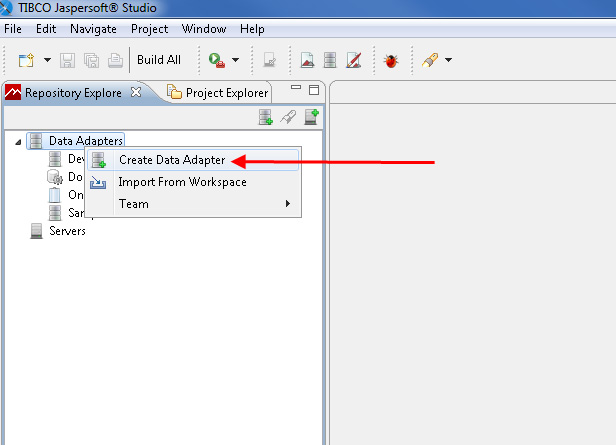
Choose the option "Create Data Adapter" via right clicking "Data Adapters" in the "Repository Explorer" in Jaspersoft Studio.
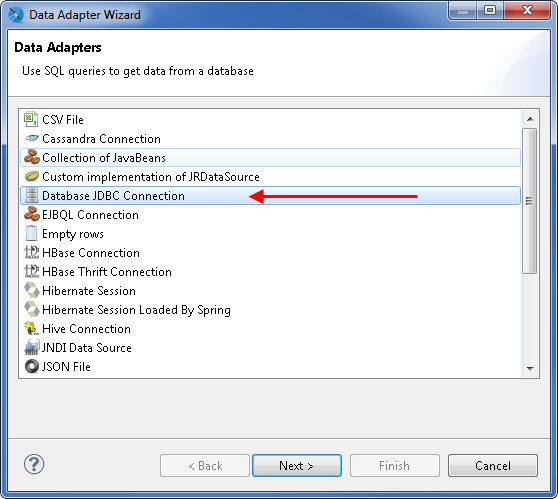
Choose "Database JDBC connection" and click on "next".
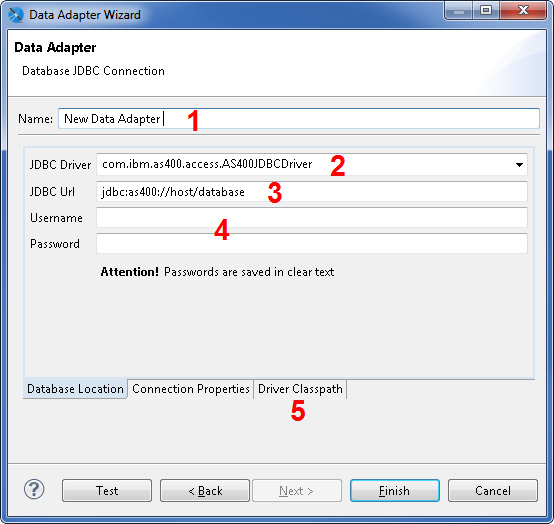
To create a database access, the following files are to be entered on the following page:
- Freely choosable names of the here configured database connections
- Class name of the IBM DB2 JDVC database driver. Enter here:„com.ibm.as400.access.AS400JDBCDriver"
- The URL to gain access on your system. It has to be in the form of jdbc:as400:// whereas it stands for the name of your system and the name of the used database. Example:
jdbc:as400://develop.meb.de/develop - User name with the access on the chosen database and password of the user
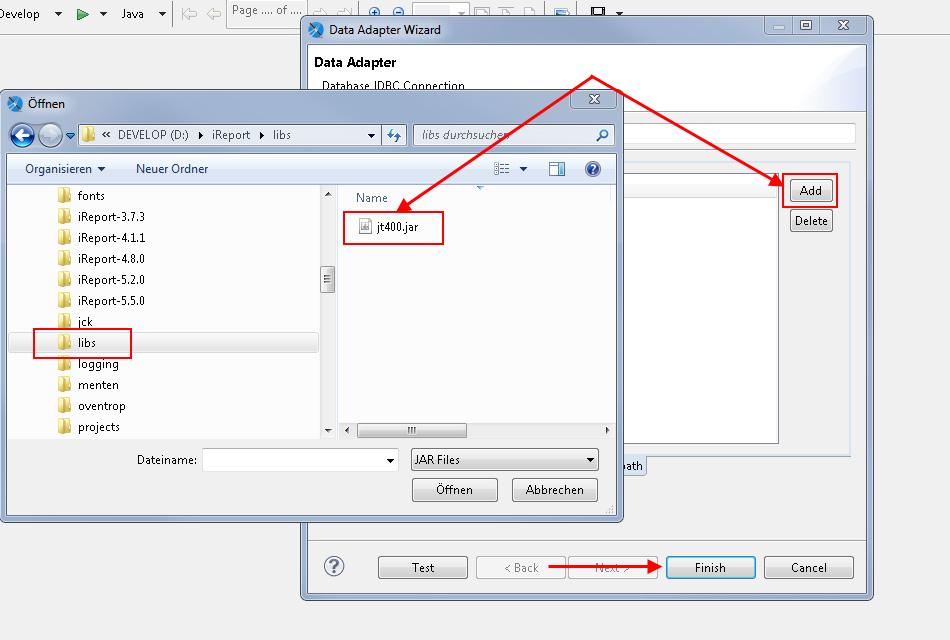
- Change to "Driver Classpath" tab. Enter here, where the file "jt400.jar" is located. In this file, the DB2 driver for Java is located. Click on "Finish" to complete the creation of the Data Adapter.
After successful creation of the new database connection it is appearing as an additional option in the "Repository Explorer" below "Data Adapters" and can be used to create a new report, as shown in the following chapter.