Exchange of certificates
Set up i-effect so that the partner can send a certificate
In this tutorial your partner wants to send his certificate to you via OFTP2. For this purpose it is necessary to store information about the recognition of the certificate.
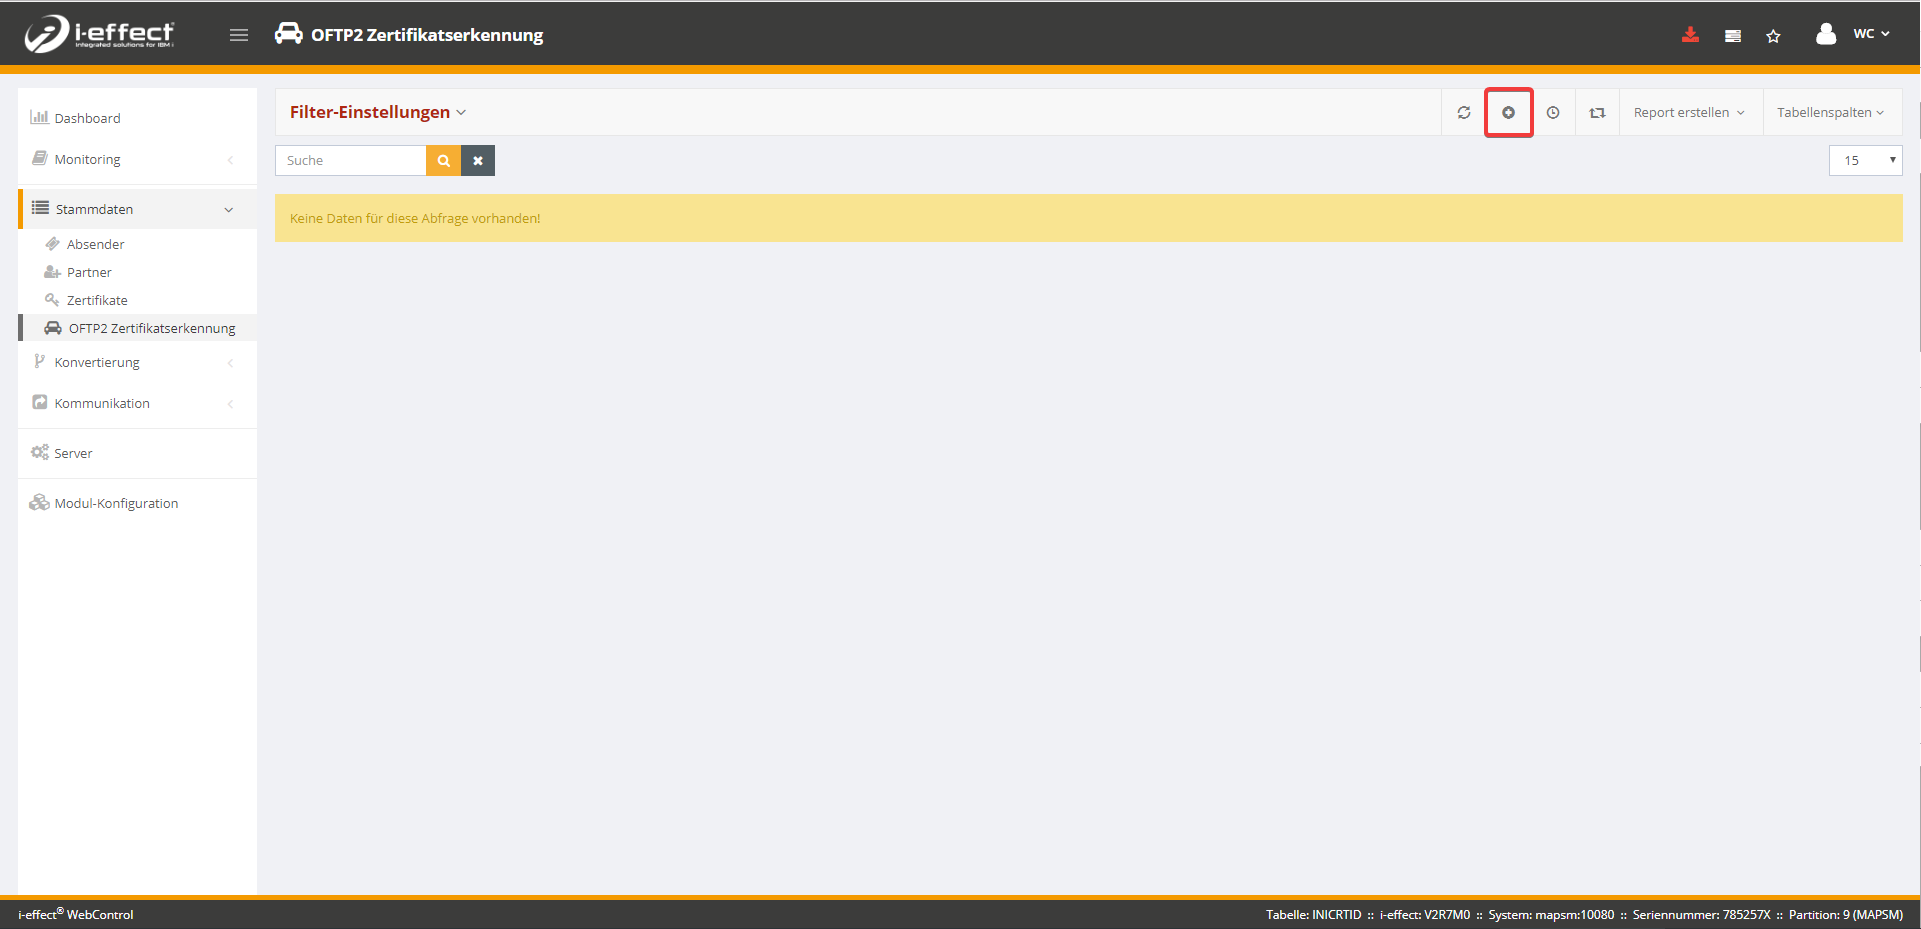
Open the OFTP2 Certificate Recognition menu under Master Data and click on the button to create a new entry.
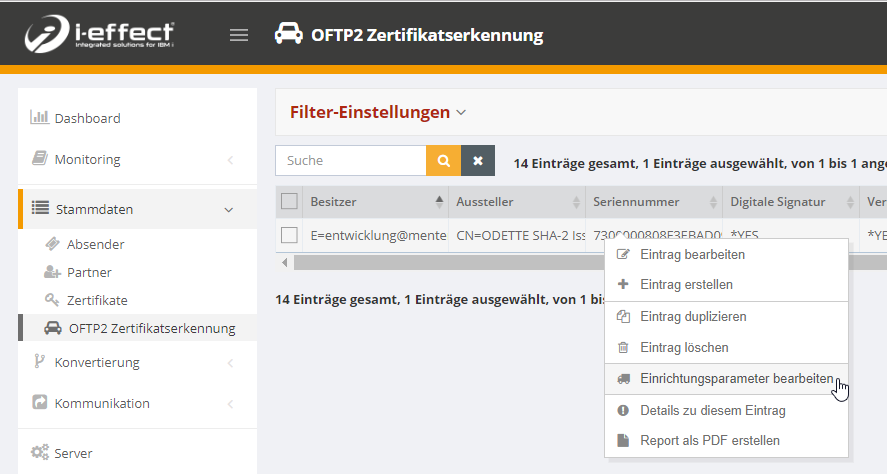
In order for i-effect to know what the certificate should be used for when it arrives, you must specify the parameters. Choose Edit Setup Parameters in the context menu:
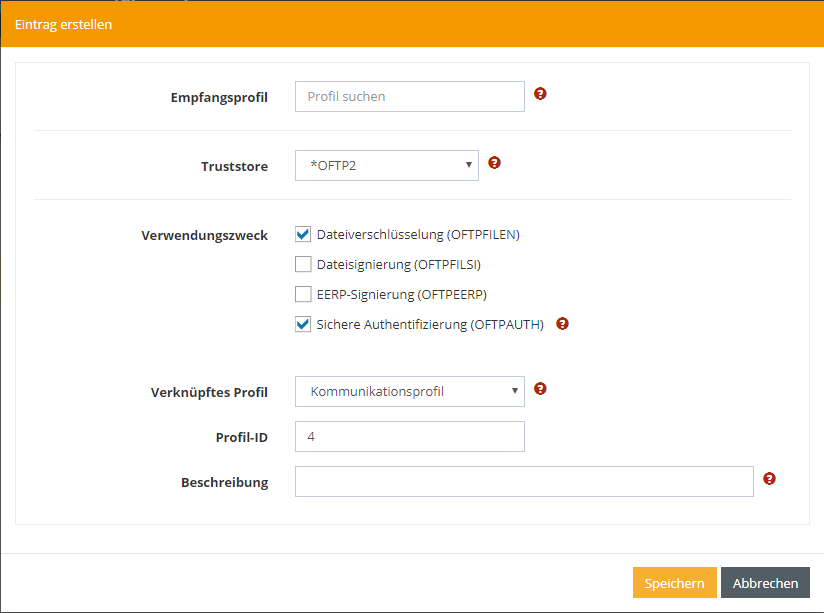
Click on the button to create a new entry.
The certificate is stored in a keystore if it is not already there. You can specify the keystore with path and password or use the default value *OFTP2.
Check the box for each purpose for which the certificate is to be used. In the i-effect configuration, the certificate is assigned to the specified partner profile or a communication profile.
After saving, received certificates can be identified by i-effect and automatically added to the configuration.
Set up private key and transfer certificate to partners
In this tutorial you set up your private key for file signing and send the certificate via OFTP2 to your partner.
Under Master data, open the Partner menu. In the context menu, choose Manage Certificates to go to the menu where you can store the private key.

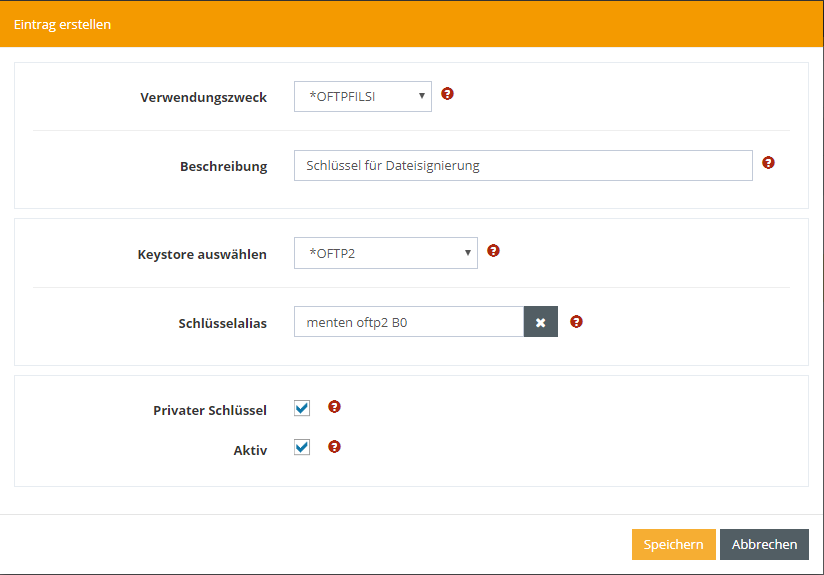
Create a new entry in the new window with the button: [i-effect application manual > Certificate Exchange > image2018-6-22_13-50-21.png]
Now you have to enter information about the private key. Specify the name in the keystore as a key alias and select the purpose *OFTPFILSI (file signing). You can specify the keystore with path and password or use the default value *OFTP2. Set both selections, since it is a key and should be used immediately.
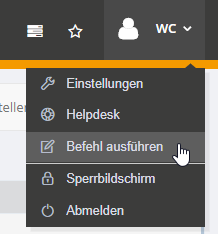
Open the Run Command menu to send a command at the top, right below your user name.
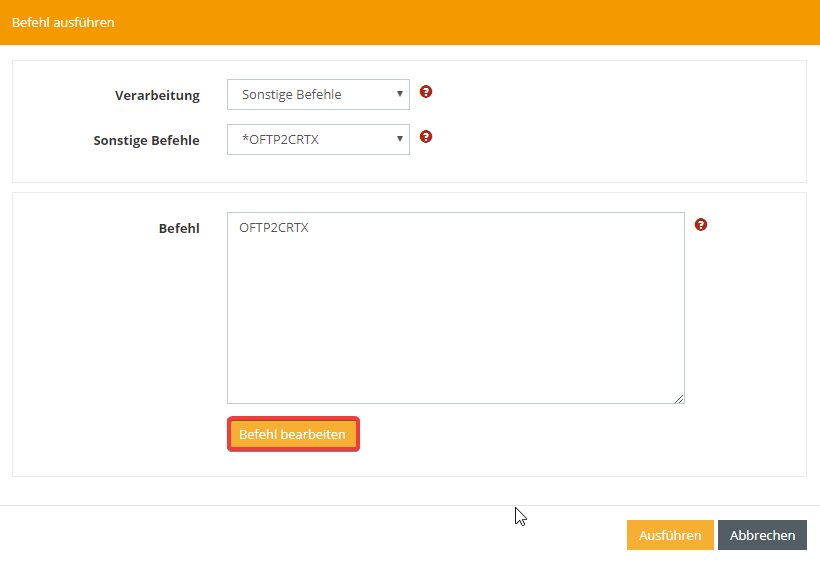
Under Other Commands, select the command *OFTP2CRTX and start with Edit Command.
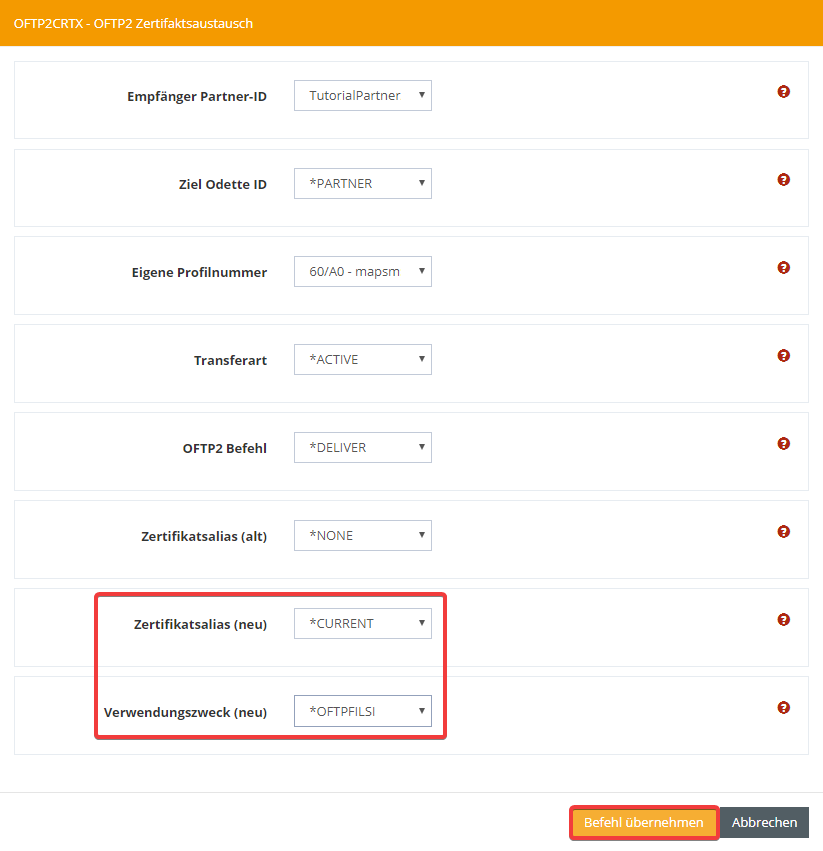
In the next window, select the partner to whom the certificate is to be sent and your own profile, which is required for communication. The transfer type *ACTIVE directly triggers a connection setup. With the OFTP2 command *DELIVER the certificate is simply transferred. Set the optional parameter for the old certificate alias to *NONE because there is no previous certificate. For the new certificate select the currently (*CURRENT) set up certificate for file signing *OFTPFILSI. Then confirm with Accept command.
Info (i) If you use the special value *OFTP, then you can use any value. The entry for *OFTP is found if it is the first entry in the hierarchy.
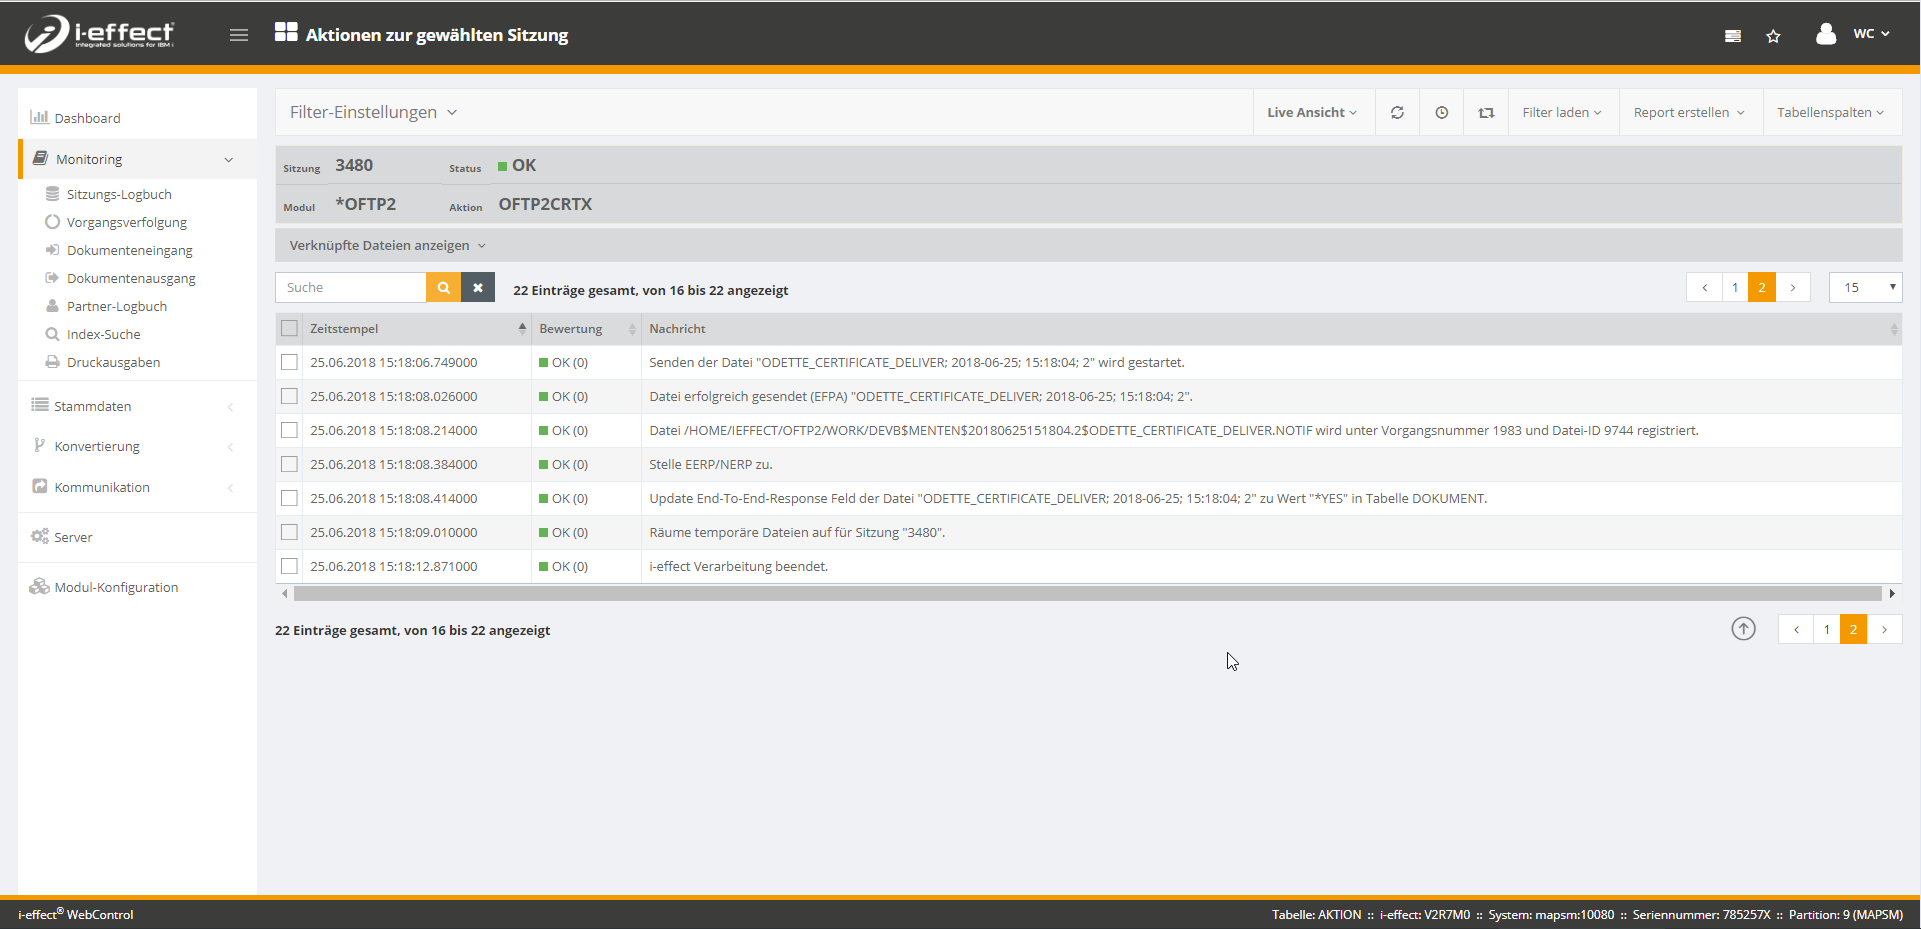
You can now execute the command. A new session is created for the command, and you can check its status in the session log.
Renew certificate and send to partner
This tutorial covers the scenario where you renew your certificate without changing the private key.
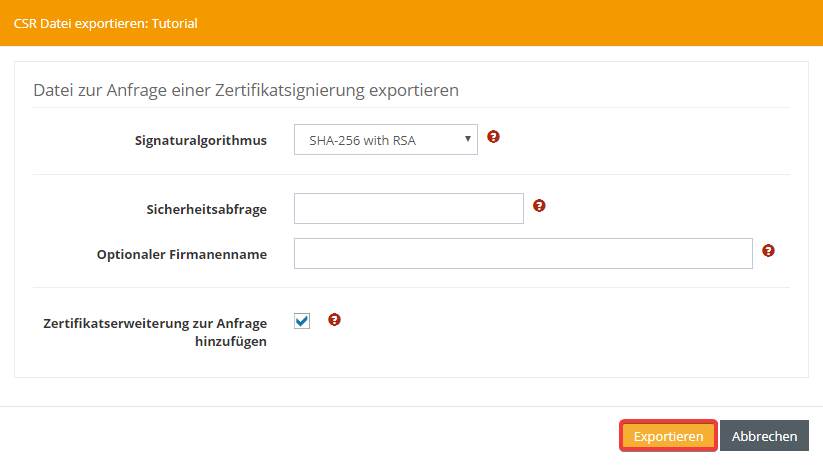
Create a new Certificate Signing Request (CSR) via WebControl. To do this, open the Certificates menu under Master Data. In the context menu of your private key (type PAIR), choose Export CSR File. Leave the default values and confirm with Export
Have the certificate signed by Odette or another provider as with the first exchange.
Save the signed certificate temporarily on the AS400, the file is needed immediately. Example: /tmp/menten_tutorial.crt
Open the Run Command menu to send a command at the top, right below your user name.
Under Other Commands, select the command *OFTP2CRTX and start with Edit Command.
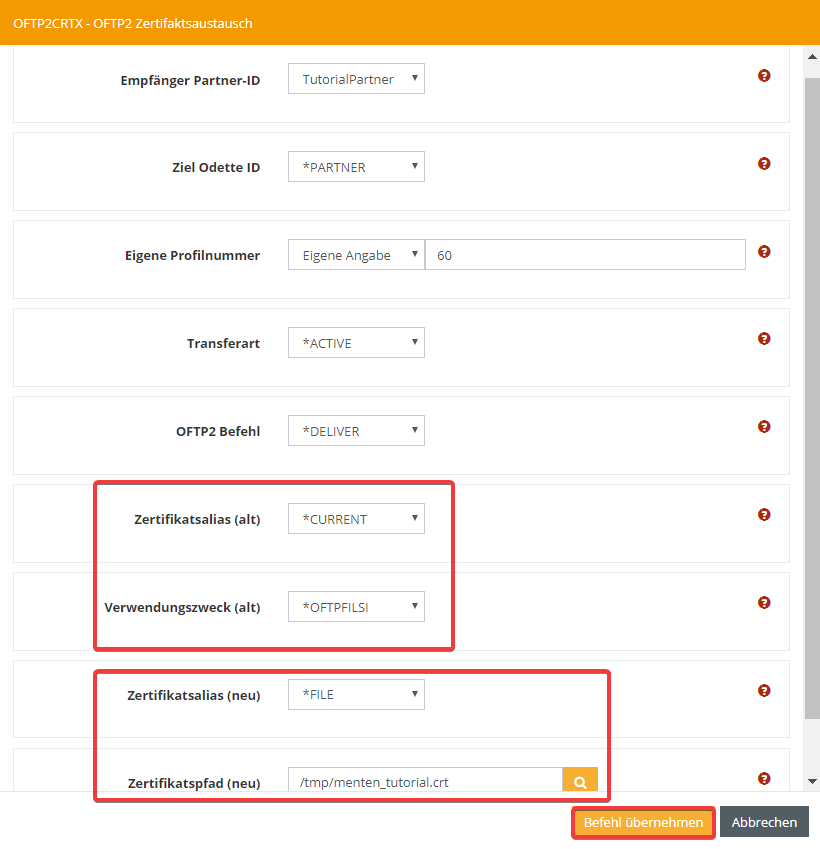
In the next window, select the partner to whom the certificate is to be sent and your own profile, which is required for communication. The transfer type *ACTIVE directly triggers a connection setup. With the OFTP2 command *DELIVER the certificate is simply transferred. In the optional parameter for the old certificate alias, you can select the current certificate (*CURRENT) for file signing. For the new certificate, select a file (*FILE), namely the previously copied, signed certificate. Then confirm with Copy command.
Info (i) If you use the special value *OFTP, then you can use any purpose. The entry for *OFTP is found if it is the first entry in the hierarchy.
You can now execute the command. A new session is created for the command, and you can check its status in the session log.